Tuesday, March 27, 2012

Happy Dance Day

This year I wasn't planning on making an Easter dress for 6-year old Emily. After all, I have saved all the previous years of handmade Easter dresses that I've made for Emily's 4 older sisters, including some beautiful smocked and embroidered dresses, and certainly Emily could wear one of them.

But:


1. Emily is not a smocked and embroidered kind of girl. Not a Fancy-Nancy kind of girl unless she's playing dress-up.


2. Emily has grown taller, and she really can use some simpler summer dresses.


3. I feel like sewing. I feel like sewing for Emily. I need something fast and easy to sew--instant gratification sewing. I need a break from all the knitting I've been doing.


4. My eldest, wise-daughter, Jessica, reminded me the other day that Emily is growing up quickly and that she will not always want me to sew for her. That I should sew for her while she's still young, because the years go by so swiftly and it won't be too long before Em won't want to wear the clothing I sew.


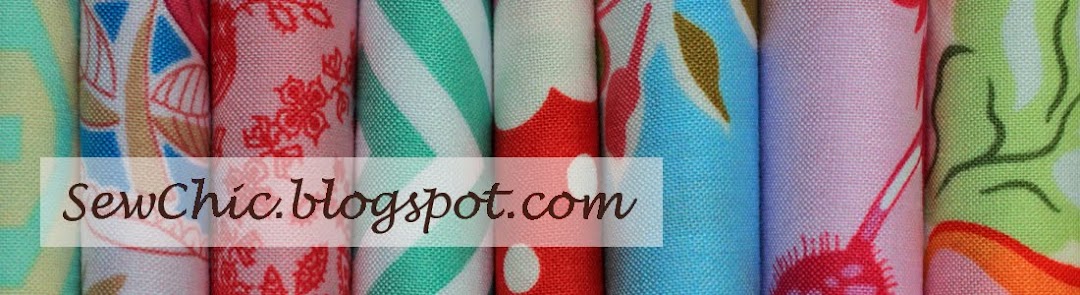
SO--Today I am sewing a dress for Emily!

It's a Happy Dance kind of day. :)
Ruth

Wednesday, March 21, 2012

Kwik Sew 3915

The buttons are on, and the hem is sewn! And I love how the shirt turned out. I don't have a picture of me wearing the shirt, because truthfully, I don't have anything to wear with it. And beside that, it's been too hot for long sleeve shirts. But, as much as I like the top, I know I'll find something to go with it. Just maybe not until next fall. :)

The fabric is a textured knit from Hancock's in a lovely shade of brown. The pattern was easy to sew, and the fit is good. I did make a bigger hem than called for because the top was too long and I didn't bother to cut off the 1" excess. Other than that, no additional modifications were made.

One bit of advice if you sew this pattern: Work carefully when you sew the point at the bottom of the v-neck. I am not totally happy with mine. I debated about taking my seam out and doing it again but was afraid of ripping a hole in the knit. So I left the point as is. It's not perfect, but I can live with it. It was either that or risk a hole in the knit.

As always, Kwik Sew instructions are fabulous with the clear illustrations and well-written directions.

Ruth


Wednesday, March 14, 2012

It's coming!

Easter, that is... Today I got out the fabric and cut Marie's Easter dress  out. 

 (I'm going to be using a Pink Fig peasant dress pattern.)

I can't believe she's 3 years old, and it's already time to make her dress... I didn't hardly enter my sewing room all this last winter, with the exception for making the flower girl dress for Katie's wedding.  Is there such a thing as sewing depression?  Life has been full, I've had a lot of general fatigue, and I needed something to make me sew....and guess what?  Now that I'm partway into this project, I'm getting excited about it, and even cut out a summer top for her while I had my stuff out!

(2011)

I think the blue polka-dot dress I made last year would still fit, (it was pretty big!) but like I said, I really need an excuse to make myself sew again.

(2010)
It's a tradition, getting a mama-made dress every year for Easter, a tradition passed down from my Mom who made us girls countless Christmas and Easter dresses.  And I'm happy to taking my place in our tradition, sewing frilly little spring dresses for Marie each year.


It's a labor of love. (Definitely cheaper to buy them nowdays!)  But dressing a little girl all girly is one of the joys of having a daughter and being a mommy.

I know I won't be able to sew for her forever, 
so I'm making the most of it now! 

Jessica

(2009--with straight hair!)


Saturday, March 10, 2012

Smarty Pants

Last weekend saw me in my sewing room working on a fun little project for Marie, my little red-headed wild child.  In the spirit of her radiant personality I wanted these "fancy pants" to be free-spirited, colorful, and very happy...just like Marie!

I came across this tutorial online that was extremely helpful so I'm not going to write a whole step-by-step tutorial...more of a quick overview.

I opened up my jeans side seams as directed in the tutorial I linked to above, and rough cut out flower designs from two Kaffe Fassett fabrics that I'd been saving in my stash for the perfect "Marie" project.


Next I ironed HeatNBond Lite to the backsides of my flowers, cut them out more precisely, and arranged and re-arranged until ended up with this arrangement. 

Note: please learn from me and iron the HeatNBond onto the fabric before you even cut the flowers out.  Because I rough cut my flowers out first, it was difficult to iron the HeatNBond onto the flowers without getting my iron and ironing board cover all sticky.

HeatNBond allows you to make a sort of  "patch" out of any piece of fabric by ironing it onto the backside of a fabric, then peeling off the paper to reveal the adhesive patch that you can then cut as desired and iron into place.  I use it all the time and LOVE it!


I started with the bottom-most layer, pressing each piece onto the denim and then stitching around each piece about 1/4inch from the edge using white thread.  Once I re-sewed up the side seams and the redid the hem in that area, the pants were done!

I also added some flowers to a plain t-shirt for a coordinating outfit, though I also have a hot pink t-shirt that she will wear with these in the summer.


My girl!


blessings,
Jessica

Kwik Sew 3915


When I first saw this Kwik Sew pattern last fall, I knew it was one I wanted to sew. I was recently reminded of the pattern a few weeks ago when I received an email from Kwik Sew with this pattern as the featured photo. And what do you know, Kwik Sew patterns were on sale at Hancock's this past week (through the 14th, I think) and so I splurged. I say "splurged" because as much as I love Kwik Sew patterns, I rarely buy them. They tend to be pricier than the big 3 patterns and they never go on sale. (I know, I just told you that they are now on sale, but really, truly, they almost never go on sale. Maybe that will change now that KS has been bought by McCall's).

Sewing this pattern reminded me, too, of how much I adore Kwik Sew patterns. The instructions and illustrations are so simply lovely. Easy to read. Easy to understand. And the fit of the KS patterns I've used has been superb.

So... I bought the pattern and fabric on Thursday and sewed it on Friday. I lost steam to finish the sleeve and bottom hems when I realized that I do not have any buttons in my stash to complete the top.

Something that dawned on me as I sewed: Why am I sewing a long-sleeve, winter top just when it's finally starting to warm up? When I am so ready for spring?! Crazy, that's what. :)

I'll post the real pictures (these are from my phone) after I buy buttons and hem the thing.

Ruth

Tuesday, March 06, 2012

Ottobre 5/2011 Raglan T-Shirt


Yes, I did sew on Sunday afternoon, and I even finished the shirt! It was an easy pattern, so it was a good project to get me sewing for myself again. I hope to keep it up...thinking of sewing a summer dress next....

If you ever make this pattern, keep in mind that the neckline is supposed to be wide. For me it was too wide. I tightened up the neckline by taking wider seam allowances on the upper part of the four raglan seams. The body of the shirt was also too big--it hung out from my sides in an a-line shape. This was easily remedied by taking in the side seams. Other than that, this pattern was perfect, and
I am happy with my finished top.

Ruth


Great fit after my modifications.
The neckband even lies flat against me, both at the front and back.
(I often have problems with loose, drippy neckbands).


This was taken on my son's 20th birthday!
His getting older means I'm getting older. :)


I used the "wrong" side of the coverstitch
to add a bit of detail to the pocket hem.

How do you like the bright pink stitching?!!!

Sunday, March 04, 2012

Afternoon Sewing Plans

So many things I want to do this afternoon: take a nap, practice my oboe, knit the scarf I just started, read a book, sew something (anything!).... So many things I should do this afternoon: practice my oboe, prepare for the week of homeschooling, plan a menu for the week, clean my bedroom....

Guess what I'm going to do?! I am going to sew!!!!! Am I excited? You bet. It's been forever since I've sewn anything for myself, so I'm going to ease into it and sew a t-shirt. A raglan-sleeve t-shirt. Easy, I hope. :))))))


The pattern is from the 05/2011 issue of Ottobre Woman. I've traced the pattern pieces, now I need to decide on the fabric...thinking of using these.... What do you think?


Also, here's a big thank you shout-out to Sivje at
Goosegirl Sews. She recently had a giveaway on her blog for this beautiful book, full of lovely projects, and the floss and needles. Thank you, Sivje! I am delighted!

Okay, back to my sewing room. Hooray!!!


Ruth

Thursday, March 01, 2012

Sewing Tip: Seam Allowance Guide


This sewing tip is not mine originally; I read about it years ago somewhere but don't remember where. But it works great, so I thought I'd share. :) I keep a circle of elastic on the free-arm of my sewing machine to use as a seam guide when I need to stitch a seam that is wider than the markings on the machine. The elastic guide is easy to move for varied seam allowances, yet it stays in place securely where you place it. To make your own elastic seam guide, just stretch a length of elastic around your sewing machine bed to fit for the right size. Sew the ends together and then place the circle of elastic around the free-arm of your machine. That's it! When I sewed the green skirt last week for my daughter, the elastic seam guide came in quite handy when I topstitched the wide hem of the skirt.